JDBC Connector Communication link failure error to MySQL
By Dillon Smart · · · 1 Comments

Are you having trouble connecting to a MySQL database through JDBC Connector in a database management tool such as DBeaver Community Edition?
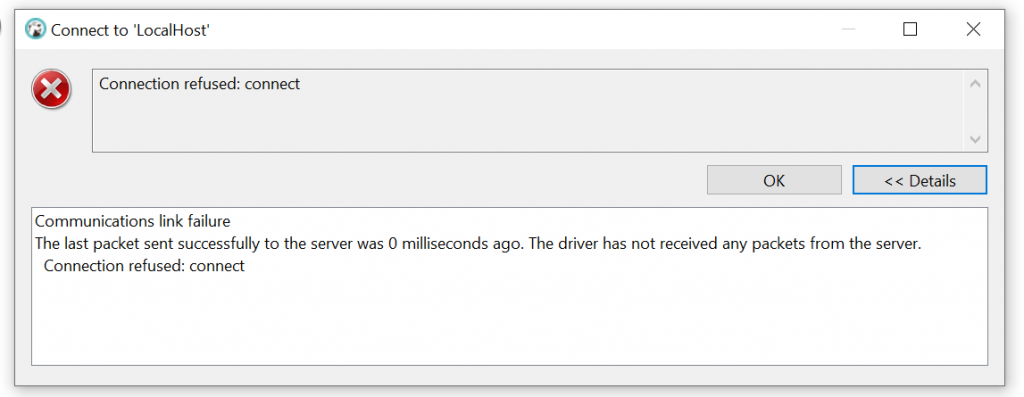
DBeaver fails to connect to a local MySQL database with the error “Communication link failure the last packet sent successfully to the server was 0 milliseconds ago“.
Here is a breakdown of this page:
Introduction
The problem isn’t with DBeaver. If you install another MySQL GUI tool, this issue will still occur.
This error occurs when the port used by MySQL is busy. To fix the communication link failure in DBeaver, we need to assign a port to MySQL.
In the solution below I used a Linux machine running Ubuntu 20.04 and verified using a Windows machine running Ubuntu 18.04 through WSL2 (Windows Subsystem for Linux).
Where possible I have provided alternative methods for both macOS and Windows.
This post also assumes you already have the correct database drivers installed and have created the MySQL connection.

Solution – Fixing communication link failure in DBeaver
First, you will need to locate your my.cnf file.
The my.cnf file is the configuration file used by MySQL. This MYSQL configuration file can reside in different locations, depending on your system and how it was installed.
Below are some locations where your installation’s my.conf could be for different operating systems.
Location of MySQL my.cnf file on MacOS or Linux
On macOS and Linux, you can find the MySQL configuration file in either the users home directory or within the /etc directory.
- ~/.my.cnf
- /etc/my.cnf
Location of MySQL my.cnf file on Windows
On a Windows machine, the MySQL configuration file can be in either the Windows directory or the root of the C drive.
In some cases, the my.cnf file can actually be a ini file, like so:
- C:\Windows\my.ini
- C:\Windows\my.cnf
- C:\my.ini
- C:\my.cnf
Once you have located the file, open it with your preferred editor. I will be using Nano.
nano /etc/mysql/my.cnfYou may need to append sudo to the command if you require higher security privileges.
Edit MySQL cnf file
Once you have opened the file using an editor, go to the bottom of the file and add the following configuration:
[mysqld]
port=3306 # or any other port
bind-address=0.0.0.0
Set the port to a port you know is open and not in use. By default, MySQL uses port 3306, but you can change this to another open port if required.
Save the file using Ctrl+O.
Now restart MySQL, there are multiple ways to do this, depending on your environment.
Restart MySQL on macOS or Linux
/etc/init.d/mysqld restart
# or
systemctl restart mysqld
Restart MySQL on Windows
- Open ‘Run’ by using Win key + R
- Type ‘services.msc’
- Now search for MySQL based on the version that is installed.
- Click on ‘restart‘
If you found this post useful, check out how to Create SSH Connections in DBeaver.
Did this solution work for you? Leave a comment with your results.
1 Comment
A.
Only resolution that helped. Many articles talk about the Bind-Address, and setting the MySQL user with host = "%", but none I came across besides this one mentioned adding the port to the my.cnf file. Great job on that. Consolidated Resolutions 0. Start the mysql service. a. Some installations call the service "mysqld" so the command to start it may be sudo service mysqld start. 1. MySQL user needs host = % and proper privileges on the database. 2. My.cnf file needs bind-address = 0.0.0.0 or can comment this line out entirely if one exists in the file to allow all interfaces. 3. My.cnf file absolutely requires the port=3306 entry or you'll get connection refused. a. Restart the mysql service on the server after updating the my.cnf. 4. Whatever firewall is installed on the server needs to allow port 3306 to listen for traffic or no matter what else you're doing you won't be able to access the database. a. Restart the firewall after making any updates. 5. Ensure that the username entered into your database connection string is case appropriate, or you'll get user denial even with correct username/password -- the username is case sensitive in MySQL. Example with Dbeaver where the user was alphanumeric and the first two characters are alpha, the remainder numeric, was getting auth failures for the user credentials until changing the case to what was stored in mysql.