Create SSH Connections in DBeaver
By Dillon Smart · · · 1 Comments

In this post, I will show you step-by-step how to Create SSH Connections in DBeaver.
Create SSH Connections in DBeaver
First, select the Create New Connection option found in the top right. This will open a window to select the database driver. In this example, I will be creating an SSH connection to a MySQL database.
Select Next.
You will now see the Connection Settings window with the Main tab selected. This window has 5 tabs to configure your connection. In this example, we will only be using the Main and SSH tabs.
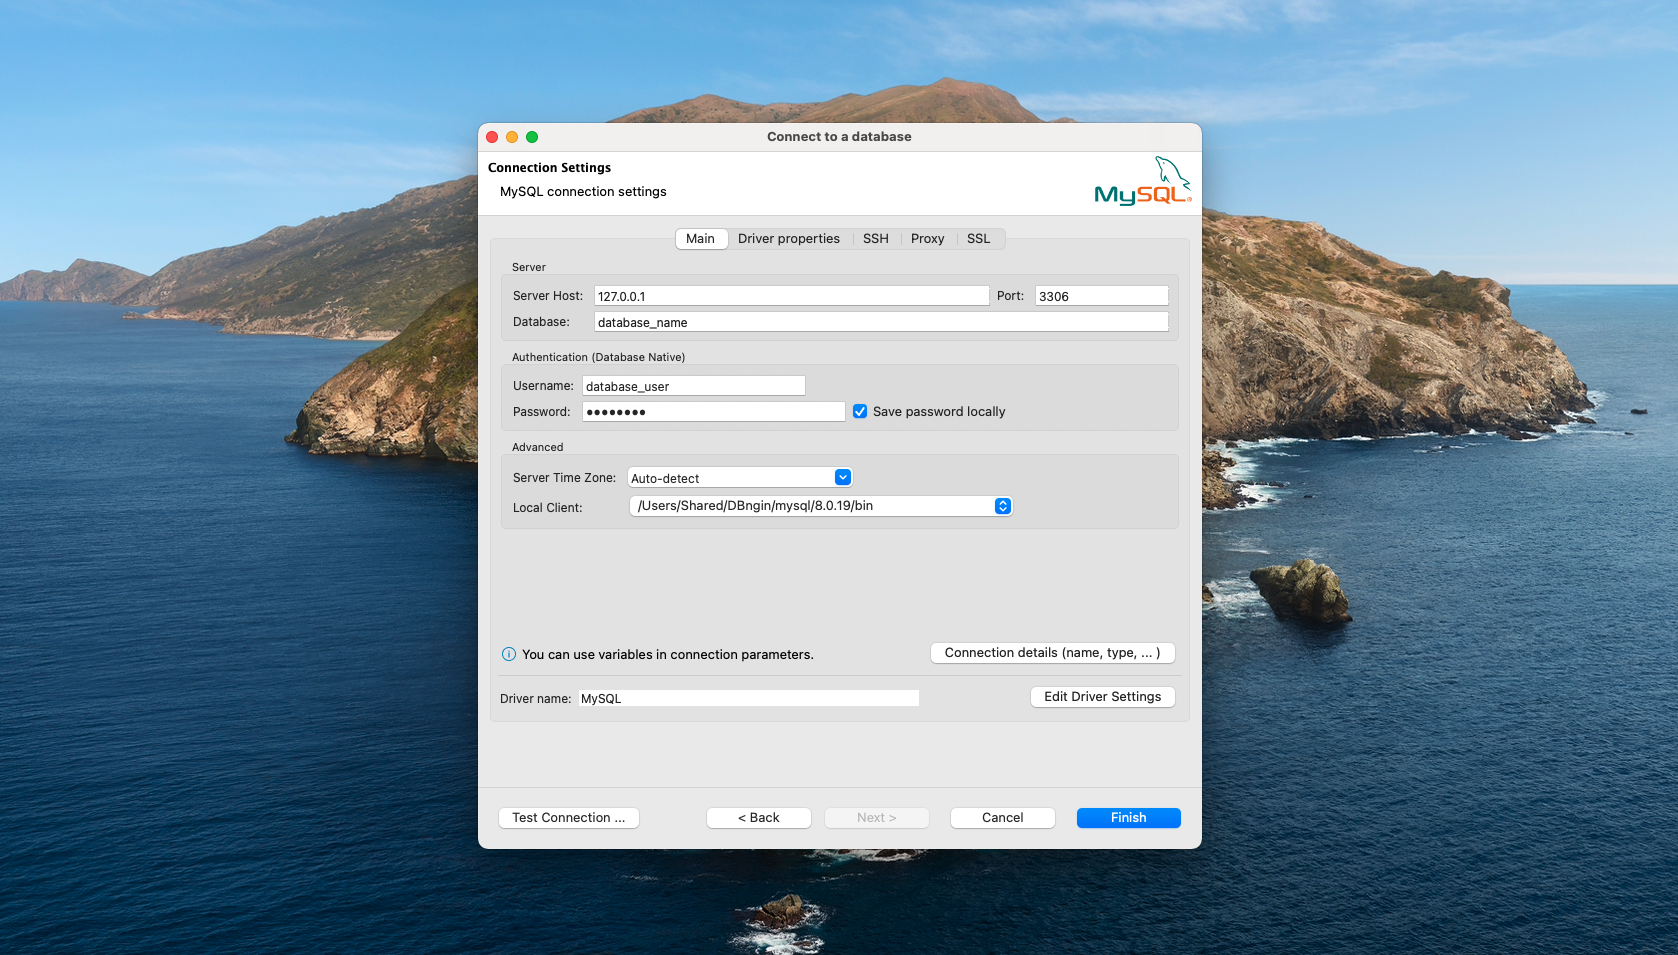
From the Main tab, enter the following details:
- Server Host
- Database
- Username
- Password
- Local Client
Server Host
Set the server host to localhost 127.0.0.1.
Because we will be connecting to the server over SSH, the database will be local, so an external IP shouldn’t be used here.
Set the Database Credentials
Enter the name of the database you will be connecting to in the Database field.
Next, enter the Username and Password. Ensure these are the credentials for the database and not the credentials used to establish the SSH connection.
Select a local MySQL Client
You will need to have a local MySQL client installed on your machine. In this example, I have a local database setup using DBngin, so I have selected the MySQL client that gets installed when installing DBngin. It’s a great tool for local database management on macOS.
If you don’t already have a local MySQL client, you can download one from the official MySQL downloads page.
SSH connection details in DBeaver
Select the SSH tab.
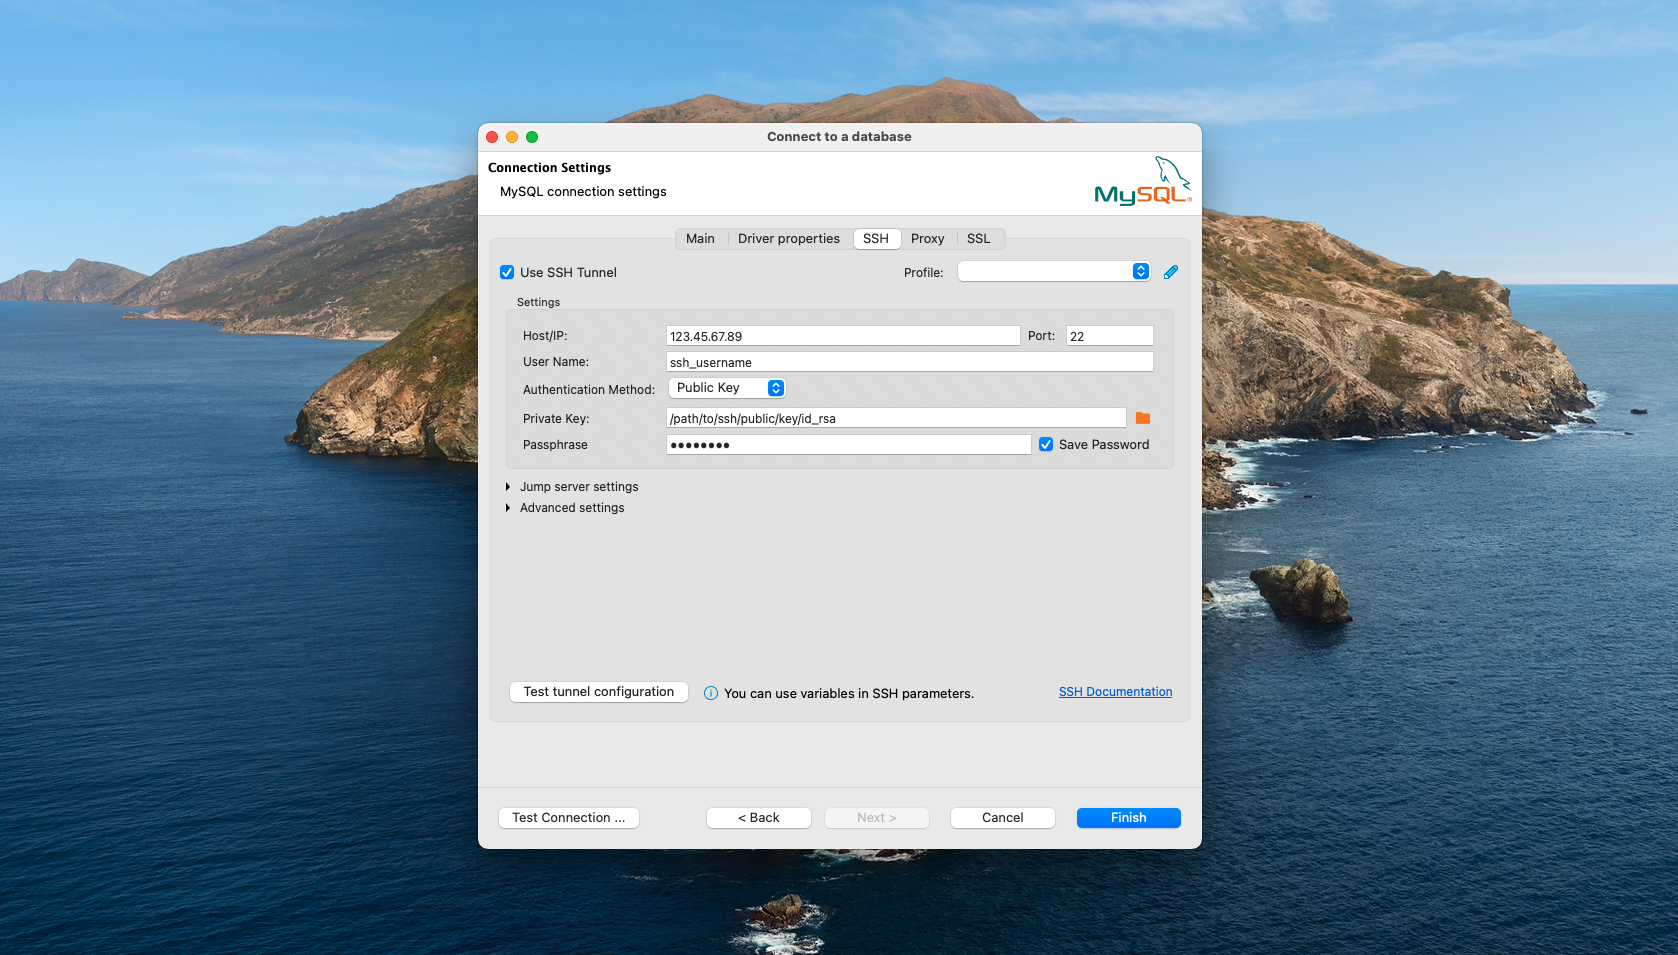
Here you will need to set the following details:
- Host/IP
- User Name
- Authentication Method
In this example, I will be authenticating using SSH keys.
Set the Host/IP to the hostname or IP Address of the server the database is on. This is the server you will be authenticating with before establishing the database connection.
Next, enter the User Name, followed by selecting Public Key from the Authentication Methods dropdown.
In the private key field, enter the absolute path to your user’s private key. You should have already added your public key to the ~/.ssh/authorized_keys file on the server.
If your key is protected with a passphrase, you will need to enter the phrase in the Passphrase field.
Test the SSH Connection
Finally, test the connection by selecting the “Test Connection … ” button at the bottom of the window.
If the connection details are correct, a new window will appear showing the connection’s success.
You have now created an SSH connection in DBeaver.
If you have trouble making connections to local MySQL databases, check out this post solving DBeaver communication link errors.
1 Comment
[SOLVED 2022] DBeaver Communication link failure - IKnowThatNow
[…] If you found this post useful, check out how to Create SSH Connections in DBeaver. […]